Creating Your Own Monotub: A Step-by-Step Guide for Beginners
- Carlos
- Aug 22, 2023
- 6 min read
Updated: 2 days ago
Audio Overview

Greetings, aspiring mycologists! Whether you’re new to the world of fungi or simply seeking a reliable method for home cultivation, the monotub is your best friend. Affordable, efficient, and easy to assemble, the monotub fruiting chamber has become a staple in mushroom growing communities for good reason.
In this guide, we’ll walk you through everything you need to know, from what a monotub is and how it works to how you can make one yourself with just a few materials. Let’s set the stage for a fruitful, fascinating adventure into the world of fungi.

What Is a Monotub Fruiting Chamber?
A monotub is a type of fruiting chamber designed to grow large quantities of mushrooms indoors. It typically consists of a plastic storage bin modified with air exchange holes and filtration to maintain a humid, clean, and oxygen-rich environment, perfect for encouraging mycelium to fruit.
The tub is filled with a bulk substrate (often a mix of sterilized grains like rye or millet mixed with coir and vermiculite), which has been fully colonized by mushroom mycelium. Once environmental conditions are just right, the mycelium transitions to fruiting mode, producing the mushrooms you’ve been patiently waiting for.
Why Choose a Monotub?
Among the many options for fruiting chambers, monotubs offer a winning combination of:
Simplicity: No need for expensive gear, misting systems, or complex sensors.
Low Maintenance: Once set up, a monotub often requires little intervention—especially during fruiting.
Discreetness: A 32-quart tub is small enough to fit in a closet or shelf.
Proven Results: Thousands of cultivators have used monotubs to reliably grow beautiful flushes of mushrooms.
If you’re looking for a straightforward way to start your cultivation journey, the monotub is like the slow cooker of the mushroom world. Set it up right, and let nature do the rest.

Materials You’ll Need to Build a MonoTub
Before we get into building your monotub, gather these essential supplies:
Plastic Storage Container (32-quart recommended): Clear or opaque—more on this below.
1” Hole Saw with Arbor Drill Bit: For making clean, round air exchange holes.
Drill: Cordless or corded.
Clear 1” Plastic Tape: For sealing holes during colonization.
Air Filters: Available on our website—custom-sized to fit snugly over your monotub holes.
Optional but useful:
Black plastic trash bag (for lining the tub)
Measuring tape
Marker (to outline where you’ll drill)
Choosing the Right Container for Your MonoTub
The type of container you choose can have a big impact on your success:
📏 Size
A 32-quart tub is perfect for beginners. It's big enough for healthy yields but small enough to manage easily. You can scale up to 64-quart or more as you gain experience.
🔍 Transparency
Clear tubs: Allow you to monitor colonization and fruiting progress without opening the tub.
Opaque tubs: Can help encourage upward mushroom growth by blocking side light.
Pro tip: The Hefty Hi-Rise 32-quart tub is a popular choice. It has the perfect height for mushroom development and comes with a dark lid that blocks out light from above until you’re ready to fruit.
Step-by-Step: How to Build a MonoTub
1. Drill the Holes
Using your 1” hole saw and drill, create four holes:
Two on the long sides of the tub, just above the substrate line (for fresh air exchange).
Two on the shorter ends, higher up (for gas release and air circulation).
Safety Tip: Wear goggles and gloves. Place the tub on a steady surface and drill slowly to avoid cracking the plastic.
If you’re using a larger tub, you may want to drill six or even eight holes total, evenly spaced.
2. Tape the Holes (For Now)
During the colonization phase, you’ll want to maintain high CO₂ levels and stable humidity. Cover the holes from the inside with clear tape. This creates a sealed environment for the mycelium to colonize the substrate fully.
Later, when you switch to fruiting conditions, you’ll remove the tape and add filters for airflow.
3. Add the Liner
Line the inside of your tub with a black trash bag before adding substrate. This helps prevent side pinning (when mushrooms fruit between the substrate and tub wall) and makes cleanup easier.
Cut the liner so it sits flush with the substrate once it’s filled.
4. Insert the Substrate and Colonized Grain
Now you’re ready to add your sterilized bulk substrate and fully colonized grain spawn. Mix them together in the tub, level the surface, and close the lid.
Keep the tub in a warm, dark place and wait for the substrate to fully colonize—usually 10–14 days.
5. Switch to Fruiting Conditions
Once colonization is complete (you’ll see a consistent white layer across the surface), it’s time to initiate fruiting:
Remove the tape from the holes.
Attach your air filters over each hole.
Expose the tub to ambient light (not direct sunlight).
Maintain room temperatures around 70–75°F (21–24°C).
Mist the inside walls of the tub lightly if it looks dry, and fan gently if air seems stagnant.
Happy Little Fungi Adherable Tub Filters for MonoTubs
When building your monotub, clean air exchange is everything—and that’s exactly where our Happy Little Fungi Adherable Tub Filters come in.
These high-quality, self-adhesive filters are specifically designed for mushroom cultivation and make a world of difference for your setup. Here’s why you’ll want to include them in your monotub construction:
🌬️ Clean, Consistent Airflow
Our filters allow just the right amount of gas exchange while blocking contaminants like mold spores, bacteria, and dust. This helps maintain an ideal microclimate inside your tub without the risk of dirty air exposure.
🧲 Easy Peel-and-Stick Application
No glue. No fiddling. Just peel, stick, and press. These filters fit perfectly over 1” holes and adhere smoothly to plastic surfaces, saving you time and frustration.
🧼 Fewer Contaminants, Better Yields
Contamination is the enemy of any grower. Using professional-grade filters drastically reduces your chances of introducing outside nasties during fruiting. That means healthier mycelium, fuller flushes, and more mushrooms.
🛠️ Built for Monotubs. Built to Last
Whether you’re using a 32-quart tub or scaling up, our filters are sized and shaped to match the industry standard. They work seamlessly with Hefty Hi-Rise bins, Sterilite containers, and other popular monotub brands.
🌿 Designed by Cultivators, for Cultivators
Each filter is tested in real grows by real mushroom lovers (that’s us!). We created them to take the guesswork out of air filtration and help you focus on what matters—growing happy little fungi.
Best of all, they're only 5$ plus shipping!
Avoiding Common Mistakes
Even simple setups can go sideways. Here are the most frequent pitfalls—and how to steer clear of them:
Poor Hole Placement: Uneven or incorrect placement can cause poor airflow and result in weak fruiting.
Skipping Filters: Don’t underestimate the power of a good filter—contaminants can ruin an entire grow.
Lid Gaps: If your tub’s lid is too loose, cover the edges with tape or switch lids to retain humidity.
Overwatering: Misting too much can cause water to pool on the substrate, inviting mold. Aim for glistening moisture, not puddles.
Harvesting and Beyond
Your first flush (mature mushrooms ready to harvest) usually appears 7–10 days after fruiting conditions begin. Use a clean blade or scissors to harvest mushrooms at the base of their stems just before the veil breaks (when the cap starts to open and separate from the stem).
Let the tub rest for a few days, rehydrate the substrate if needed (known as “dunking”), and you may see a second or even third flush!

Ready to Learn More? Here are Some Books to Read
For mushroom hobbyists ready to go beyond basic tutorials, here are some highly regarded books that combine practical growing techniques with ecological and scientific insights:
Often cited as the most comprehensive guide for growers, from hobbyists to commercial setups, this book spans over 500 pages covering cultivation of over 30 species, lab techniques, substrate formulas, environment control, and advanced spawn strategies. It’s considered a must-have reference for serious cultivators.
This book helped me really learn to grow all kinds of mushrooms! Still sits on my shelf. It was foundational for me.
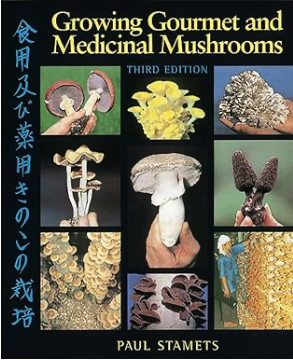
A classic manual focused on home growing, this edition walks you through sterile culture, spawn production, strain development, compost preparation, and detailed species requirements. It’s widely praised as one of the best resources for understanding mushroom life cycles, contamination control, and multi-species growing.
This was the first book I read on mushroom cultivation and set off a desire to learn as much as I could about the fungal kingdom.
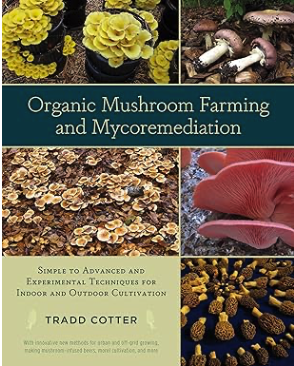
Blending environmental science with growing techniques, this book explores mycoremediation, mycoforestry, pest control, and ecological impact. It’s a thought‑provoking read that places mushroom cultivation within a broader context of sustainability and habitat restoration.
This book helped me think wholistically about integrating fungal partners into the natural world.
Ideal for growers curious about sustainability, soil remediation, and innovative outdoor cultivation methods. Cotter’s approachable methods and ecological view bridge indoor hobbyist cultivation and environmental applications.
I attended on of Tradd's workshops over a decade ago! It was so encouraging to see people actually putting these tools into practice! So greatly indebted to him for showing and teaching me so much about real-life applications.


